Tutorial: Alpha'd and Bumped Feathers
- Nov 25, 2015
- 4 min read
Gather round, kids, it's time to go step-by-step on how to create a handsome flower like this one right here...

This one is a feather quill modelled for my Writing Desk project, and I won't be doing the handle, but the feather itself is quite easy.
Now, if you want to sculpt all those bits of feather in Zbrush and normal map the whole thing, I'm not going to stop you, but this one will be a simple plane for a much faster result.
So, we're going to start with a cylinder.

Make it nice and tall (and skinny), I set the axis subdivisions down to 12 but the height divisions to 15.

Ducking into side view, use soft select to make a nice curve in your cylinder. This is going to be the stick that runs down the centre of the feather. There's probably a more technical name for it, but I'll be going with stick.

So, I wasn't actually happy with the skinniness of my stick, so I scaled it in and re-curved it.

Time to make a plane. I made it 12 by 4... It's important to have a line running down the centre of the flower. Set up the bottom line of the plane so start roughly where you want your feather to start.

Back in side view, dragging the vertices along the stick, a relatively even split and enough to have a smooth curve.

Now it's starting to look roughly like a feather. I actually ended up extruding more faces on both ends, so now it's 14x4. The plane keeps going after the end of the stick - this will become the top part of the feather that curves around.

A real simple unwrap with UVs taken into your painting program of choice. I'll be using a mixture of Photoshop and PaintTool SAI.

I've given the stick a real simple base colour, that's just going to sit there for the moment. I used SAI's basic brush on full opacity to start drawing out the shape of the flower within the UVs of the plane. (Note: I'm left handed, so the right side of the flower is easier for me to draw.) Keep in mind the direction the bits of the feather - the base will be doing out more horizontal and at the top it should be going almost directly up/down.

Filling in the gaps and using a smaller brush to give a little more detail around the edges.

Duplicated and mirrored the green layer, then went in manually and erased and redrew some spots to make it not entirely the same all the way around. If you're feeling micro-manage-y, you can try draw the entire thing by hand but I guarantee one side will work better than the other.

Time to add more colour. A little at a time, and it's important to keep it on different layers. This was painted using the Brush, Streak, and Blend tools from SAI. The stick was done with a Speckle brush.

Note: Layers. And don't forget your naming, or you'll get lost when it's time to do the rest of the textures.

Applying the colour is always fun... Remember to export the diffuse as a PNG or something similar, using PSD files in your textures is a bad habit to get into.

Hey look, it's an alpha map. I know you -can- add an alpha channel into the mix or even just export the diffuse without a background colour, but I find Maya is really touchy with its transparency. The most efficient way I've ever found is a PNG with no data (rather than black) plugged into the transparency setting.
To get the alpha, bump, and specular maps, I created a duplicate file of the PSD used to make the Diffuse and went in and used the existing layer information. This is the base colour of both the feather and the stick with a Hue/Saturation adjustment layer to turn them to white.

The bump map - picking the most "streaky" of my feather layers and playing with their brightness. I also ran into trouble the first time around with the edges of the feather really standing out, so a quick go around the edges of the feather with an airbrush set to black softens it out nicely. The stick is allowed to keep its Speckle to give it a little bumpiness but it will be so small it doesn't really matter.

Specular map - A Black and White adjustment layer underneath the top colour layers of the feather give a nice effect in the specular, and made sure to include a few areas of brightness for contrast. I wanted the stick to be rather flat so it didn't steal attention, so a simple dark grey will do.

This is what the feather looks like after applying the textures. It's almost done.
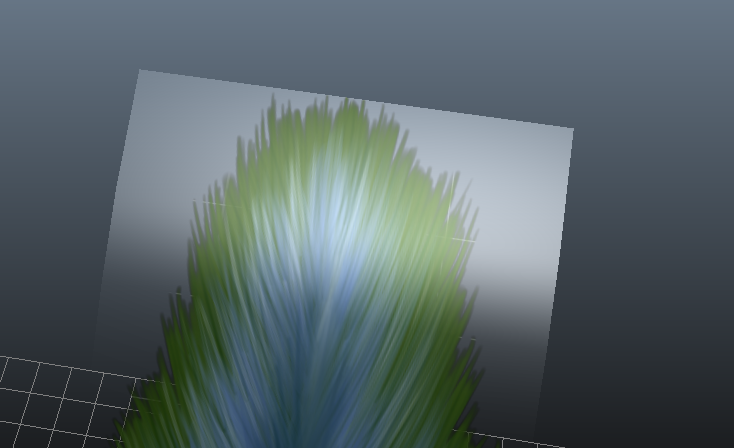
Side note: Make sure the area on your spec map around your feather is completely black or this will be the result.

Side note #2: Pulling the vertices at the end of the stick will give them less of a "rounded" look. If you're feeling less lazy than I was at this point, chamfering that final point is probably a good idea. Same goes for the other end if you want something more specific from your feather (e.g. a quill tip) but that's up to you.

The last step is to grab those side edges and pull them back a bit, giving the feather a bit more shape and roundness.

I take it back - the last step is presentation. Render the feather out with some lights and voila - you have a nice little feather.
This technique is ideal for creating assets for games and such where a low polygon count is necessary.
Of course, the more time you spend on your textures, the nicer your feather will look. This one was created purely for the purpose of making this tutorial, so forgive me if it isn't perfect.


Comments